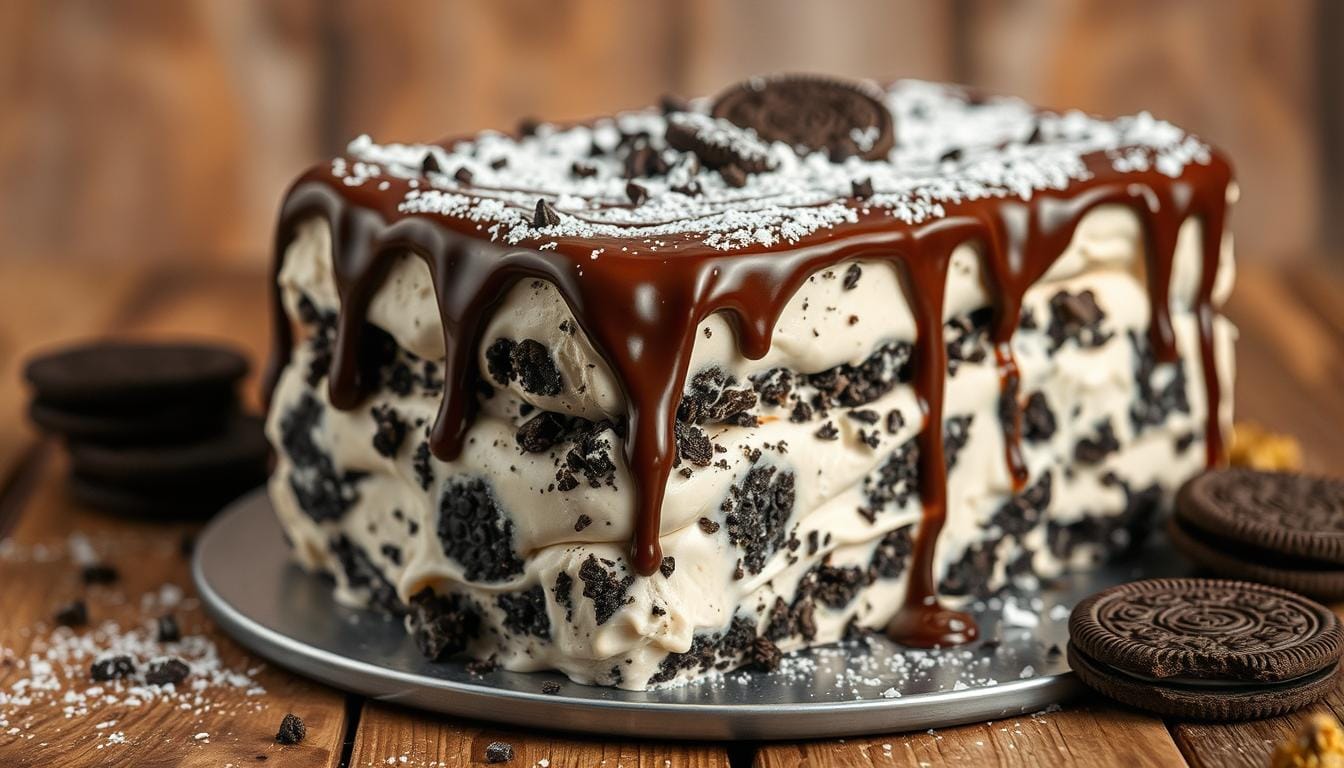
Are you ready to make a dessert that will wow your friends and family? This Oreo ice cream cake recipe is quick and easy. It needs just 20 minutes to prepare and 8 hours to freeze. It serves 12 people and is a real showstopper.
This recipe is simple, needing only Oreos, cookies ‘n cream ice cream, hot fudge, and whipped topping. You can also add your own twist to the flavors. It’s perfect for any celebration. So, how can you make this amazing homemade ice cream cake?
This cake has 5 layers of deliciousness. It includes crushed Oreos, cookies ‘n cream ice cream, hot fudge, whipped topping, and more crushed Oreos. You’ll need about 39 Oreo cookies and 1.75 quarts of ice cream. Each serving has 465 calories, 55g of carbs, and 25g of fat.
Whether you love classic or unique flavors, this cake will hit the spot. Let’s explore the world of homemade ice cream cakes, starting with this Oreo ice cream cake recipe.
Table of Contents
What You Need for Your Oreo Ice Cream Cake
To make a tasty Oreo ice cream cake, you’ll need some key ingredients and tools. The cake starts with an Oreo crust. You’ll need 24 Oreo cookies and 1/2 cup of unsalted butter for this.
For the filling, use 1 liter of Oreo ice cream and 1/2 cup of thick hot fudge sauce. The ice cream flavors you pick can really change the cake’s taste. Try unique flavors for a special dessert.
You’ll also need a food processor to crush the Oreos. And a springform pan to shape the cake.

- 1 liter of Oreo ice cream
- 1/2 cup of thick hot fudge sauce
- 24 Oreo cookies
- 1/2 cup of unsalted butter
With these ingredients and the right tools, you can make a great Oreo ice cream cake. It will have a crunchy crust and unique flavors.
Choosing the Right Ice Cream Flavors
When making an Oreo ice cream cake, picking the right ice cream flavors is key. You need flavors that go well with the Oreo crust and other ingredients. Vanilla ice cream is a classic choice, or you can try mint chip or cookie dough for something different.
Experts say using Oreo ice cream and chocolate fudge makes the cake rich and decadent. You can mix and match flavors to find what you like best. Always follow the freezing instructions to keep your ice cream flavors perfect.

These flavors can be used alone or together for a unique taste. By picking the right ice cream and following freezing tips, your Oreo ice cream cake will wow everyone.
Preparing the Oreo Crust
To make a tasty homemade ice cream cake, you need a good base. That base is the Oreo crust. It takes about 15 minutes to prepare and is key to your cake’s success. You’ll need 36 Oreo cookies for the crust, and you don’t have to remove the cream filling.
Start by crushing the Oreo cookies. You can use a food processor or a plastic bag and a rolling pin. After crushing, mix the cookies with 7 tablespoons of melted butter. Make sure the butter is cooled a bit.
- Crush 36 Oreo cookies in a food processor or with a rolling pin
- Melt 7 tablespoons of unsalted butter and let it cool slightly
- Mix the crushed cookies with the melted butter until well combined
- Press the mixture into a 9 x 13-inch baking pan
By following these steps, you’ll have a tasty Oreo crust for your ice cream cake. The Oreo crust is what makes your cake special. With the right ingredients and a bit of effort, you’ll impress everyone with your homemade ice cream cake.
Assembling Your Ice Cream Cake
To start, prepare the layers of your ice cream cake. Soften the ice cream at room temperature for 10 to 15 minutes. This makes it easier to spread evenly. Always follow the freezing instructions to avoid melting and keep the texture smooth.
Here are some tips for assembling your cake:
- Use a 13×9-inch dish to assemble the cake, making it easier to create even layers.
- Freeze the cake for at least 2 hours or until firm after adding the whipped topping layer.
- Consider freezing the cake after every step to prevent melting and ensure a smooth texture.
When serving, use serving suggestions to make your cake look great. Use a sharp knife for clean cuts. Rinse the knife under hot water between cuts for the cleanest slices. Always follow the freezing instructions and serving suggestions for the best results.
By following these tips, you’ll make a delicious and beautiful ice cream cake. It’s sure to impress your friends and family.
Freezing Your Cake to Perfection
To get your Oreo ice cream cake just right, follow the freezing steps carefully. Freezing is key for the perfect texture and taste. Let your cake freeze for at least 4 hours, or even better, overnight.
For storing, use a freezer-safe container that seals well to avoid freezer burn. You can also wrap it in plastic or foil to keep air out. These steps help your cake stay fresh for up to a month.
- Make sure the cake is fully put together and decorated before freezing.
- Use a cake carrier or a strong container to avoid damage when moving it.
- Let the cake sit at room temperature for 10-15 minutes before serving. This helps it soften a bit.
By following these steps, your Oreo ice cream cake will be perfect and stay fresh for a while. Always handle it gently and keep it in a cool, dry spot to avoid damage.
Adding a Tasty Topping
When it comes to serving your Oreo ice cream cake, the toppings are key. A delicious homemade whipped cream is a great choice. You’ll need 2 cups of heavy cream and ¼ cup of powdered sugar. Whip them together in a metal bowl until stiff peaks form, which takes about 3 to 4 minutes.
Popular toppings include hot fudge, caramel sauce, and chopped Oreo cookies. You can also use your homemade whipped cream as a topping. Set aside 1 cup for decorating. Drizzle chocolate syrup over the top before freezing for an extra touch.
Here are some serving suggestions to consider:
- Let the cake sit at room temperature for 10 minutes before serving to ease slicing.
- Rinse the knife under hot water between each cut for cleaner slices.
- Consider pairing your cake with a beverage, such as hot coffee or tea.
For extra flair, add sprinkles or chopped nuts to your cake. Your Oreo ice cream cake will be a hit with its creamy homemade whipped cream and tasty toppings.
| Topping | Quantity |
|---|---|
| Hot fudge | 1 cup |
| Caramel sauce | 1 cup |
| Chopped Oreo cookies | 10 cookies |
| Homemade whipped cream | 2 cups |
Serving Suggestions for Your Cake
There are many ways to serve your Oreo ice cream cake. You can enjoy it alone or with drinks like coffee and hot chocolate. Here are some serving suggestions to enhance your experience.
To make your cake look great, cut it into thin slices. Serve on a fancy plate or platter. Add whipped cream or chocolate shavings for extra flair. For storage tips, keep it in the freezer until serving. Label it with the date made to track storage time.
- Coffee: a classic combination that’s perfect for a morning or afternoon pick-me-up
- Hot chocolate: a rich and decadent pairing that’s great for cold winter nights
- Milk: a simple but effective pairing that’s perfect for those who want to keep things straightforward
By following theseserving suggestionsandstorage tips, your Oreo ice cream cake will always be a hit.
Storing Leftovers Properly
Storing leftovers of your Oreo ice cream cake right is key to keeping it fresh. You can keep it in the freezer for up to 3 months if you wrap it well. Use plastic wrap or aluminum foil and then put it in a freezer-safe bag.
It’s important to freeze the cake after each step to stop it from melting. Also, label it with the date and what’s inside. This helps you know how long it’s been in the freezer.
Here are some extra tips for storing your cake:
- Put the cake in the coldest part of the freezer, like the bottom shelf.
- Don’t store it near foods with strong smells, as it can pick up odors.
- Keep it away from sunlight and heat.
By following these tips, you can enjoy your cake for longer. Just remember to eat leftovers within a week for the best taste and texture.
To make slicing easier, take the cake out of the freezer 10-15 minutes before you cut it. This lets it soften a bit, making it simpler to serve.
| Storage Method | Storage Time | Notes |
|---|---|---|
| Freezer | Up to 3 months | Wrap tightly in plastic wrap or aluminum foil and place in a freezer-safe bag |
| Refrigerator | Not recommended | The cake will melt and lose its texture |
Variations of the Oreo Ice Cream Cake
Homemade ice cream cakes offer endless possibilities. The Oreo ice cream cake is a favorite, with a crust of Oreo cookies. You’ll need 3 cups of cookie crumbs and 6-8 tablespoons of unsalted butter for the crust. Feel free to mix things up by using different ice cream flavors or adding nuts or candy pieces.
Making a homemade ice cream cake is a fun way to be creative. You could swap the crust for chocolate sandwich cookies or peanut butter cookies. Add sprinkles or chopped nuts to the ice cream for extra flavor. The most important thing is to have fun and be creative.
Here are some ideas for variations of the Oreo ice cream cake:
- Use different flavors of ice cream, such as mint or strawberry
- Add nuts or candy pieces to the ice cream
- Use a different type of cookie for the crust
- Top the cake with whipped cream or chocolate sauce
These variations can help you create a unique and tasty homemade ice cream cake. It’s sure to wow your friends and family. So, don’t be shy to try new things and remember to use a high-quality Oreo crust.
| Variation | Description |
|---|---|
| Oreo Mint | Use mint ice cream and add chocolate chips or sprinkles |
| Oreo Strawberry | Use strawberry ice cream and add sliced strawberries or whipped cream |
| Oreo Peanut Butter | Use peanut butter ice cream and add peanut butter cups or chopped peanuts |
Conclusion: Enjoying Your Homemade Treat
Now that you’ve mastered the art of creating the ultimate homemade ice cream cake, it’s time to savor the delicious results. Share your impressive creation with friends and family, and make it a cherished yearly tradition. This decadent Oreo ice cream cake is sure to become a crowd-pleaser at any celebration or casual gathering.
Sharing with Loved Ones
Gather your nearest and dearest and present your beautifully assembled homemade ice cream cake. Watch their faces light up as they take the first bite. They’ll experience the perfect balance of creamy ice cream, crunchy Oreos, and rich chocolate. Seeing the joy on their faces will make all your hard work truly worthwhile.
Making it a Yearly Ritual
Consider making this Oreo ice cream cake a staple in your household, a delightful treat to look forward to year after year. Whether it’s for a birthday, holiday, or just a special summer celebration, this indulgent dessert is sure to become a much-anticipated tradition that your loved ones will cherish.
FAQ
What are the crunchies in ice cream cake made of?
The crunchies in ice cream cakes are typically made of chocolate cookie crumbs, toffee bits, or crushed candy bars mixed with a sweet syrup or butter to bind them together. These add a satisfying texture and flavor contrast to the creamy layers of the cake.
How to make 3-ingredient Oreo ice cream?
To make 3-ingredient Oreo ice cream, blend heavy cream, sweetened condensed milk, and crushed Oreo cookies. Mix until well combined, then freeze the mixture in a container for at least 4 hours or overnight until firm. It’s a simple and indulgent dessert that doesn’t require an ice cream maker!
What does Dairy Queen put in their ice cream cake?
Dairy Queen’s ice cream cakes typically consist of layers of vanilla and chocolate ice cream, a crunchy layer (usually made of chocolate cookie crumbs and chocolate fudge), and a decorative icing made from whipped cream or frosting. The cake is often finished with chocolate fudge or sprinkles for decoration.
What is the frosting on ice cream cake made of?
The frosting on an ice cream cake is typically made from whipped cream, vegetable shortening, or buttercream. Some ice cream cakes may also use frosting made with heavy cream and a bit of sugar to create a light, fluffy texture that holds up well in freezing temperatures.

